Positioning
Positioning in Geometry Dash uses a few main variables
- Position (X, Y)
- Content Size
- Anchor Point
DevTools
Before starting out, I recommend you install the DevTools mod. This mod can be found on the index. DevTools allows you to view positions, scale, rotation, content size, aspect ratio, and more for all nodes that are active on the screen. This will help you greatly with positioning your own nodes.
Position
Position is the simplest variable you can modify. It controls a node’s position relative to their parent. Cocos positions start at the bottom left corner (0, 0) and increase until the top right corner. You can get the maximum current screen size (which can be altered by aspect ratio) by using the CCDirector class.
#include <Geode/cocos/CCDirector.h>

using namespace geode::prelude

bool MyLayer::init() {
    // ...
    CCSize screenSize = CCDirector::sharedDirector()->getWinSize();
    // ...
}
At the top most level of the node tree, you can use the screen size to place a node in a position that is relative to the screen edges (or the center). This comes in handy if you want to handle multiple aspect ratios. Do keep in mind that you will have to modify the node’s Anchor Point if you are placing it relative to screen edges. Below are some simple examples of doing exactly that.
#include <Geode/cocos/CCDirector.h>
#include <Geode/binding/ButtonSprite.h>

using namespace geode::prelude

bool MyLayer::init() {
    // ...
    CCSize screenSize = CCDirector::sharedDirector()->getWinSize();
    ButtonSprite* sprite = ButtonSprite::create("Hello");

    // Place sprite in the middle of the screen
    sprite->setPosition(screenSize / 2);

    // Place sprite at the top of the screen, centered
    sprite->setPosition({ screenSize.width / 2, screenSize.height - 30.f });

    // Place sprite at the left of the screen, centered vertically
    sprite->setPosition({ 0, screenSize.height / 2 });
    // ...
}
⚠️ This method is only useful for placing nodes inside parents that take up the whole screen size. For any other purposes, you will have to place children relative to the parent’s Content Size. This will be explained shortly.
Positioning can also be done using raw numbers. This is not recommended, as it can cause troubles when dealing with different aspect ratios. Here’s a code snippet for completeness’ sake.
#include <Geode/cocos/base_nodes/CCNode.h>

using namespace geode::prelude;

bool MyLayer::init() {
    //...
    // Simple node, doesn't display anything
    CCNode* node = CCNode::create();
    node->setPosition({ 50.f, 20.f });
    //...
}
You can also use DevTools to move nodes in real time and check their position values. Again, using raw numbers for positioning is not recommended, but you can get a general idea of where you want your node to be placed at.
Content Size
Content size dictates how much space a node and its children take up. This has many uses. First of all, we can use a node’s content size to place children relative to the parent’s borders, or relative to other children inside the layer. There are 2 main approaches to setting a node’s content size.
- Setting the content size prior to adding any children, if we know how much space the parent should take beforehand. A great example for this approach are popups. If you have read the Popup Tutorial, then you probably remember that when creating a popup, you give it a width and a height. These values are used to give the popup its content size.
- Setting the content size after adding and positioning the children. This is usually done by calculating the borders of the parent using the children that are the furthest from (0, 0). A good example of this would be button menus. Maybe we have a weird layout, that can’t make use of Layouts, or a menu that has children added to it after it is initialised. For that, we would have to calculate the content size of the parent. Of course, if you use Layouts, you just have to set a content size, and the layout will automatically resize the children to match that content size (if auto-scale is enabled), otherwise, you will also have to calculate the content size yourself.
Cocos nodes have different behaviour when it comes to content size. The most popular example to give here is CCMenu, which sets its content size to the screen size. RobTop doesn’t modify this content size, which is a valid approach to this problem, but we are better than this!
Here are some simple examples! First, a simple menu that places 2 buttons on a diagonal.
#include <Geode/cocos/menu_nodes/CCMenu.h>

using namespace geode::prelude;

bool MyLayer::init() {
    //...
    CCMenu* menu = CCMenu::create();

    CCMenuItemSpriteExtra* button1 = CCMenuItemSpriteExtra::create(
        CCSprite::create("GJ_button_01.png"),
        this,
        nullptr // we don't care about the callback in this context
    );

    CCMenuItemSpriteExtra* button2 = CCMenuItemSpriteExtra::create(
        CCSprite::create("GJ_button_01.png"),
        this,
        nullptr // we don't care about the callback in this context
    );

    // We know that the button content size is {40.f, 40.f} (by checking with DevTools), so we will set the menu's content size accordingly.

    // Just enough to fit a 2x2 grid of buttons, we will place our buttons on a diagonal
    menu->setContentSize({ 80.f, 80.f });

    // Ignore this for now
    menu->ignoreAnchorPointForPosition(false);

    // Now, we are going to set the positioning of our buttons using the parent's content size and the buttons' content sizes. I will explain why we do this when we talk about anchor points.

    // This sets the position of `button1` as the **bottom left** corner of the parent, while also accounting for the default anchor point of the button {0.5f, 0.5f}
    button1->setPosition(button1->getContentSize() / 2);

    // This sets the position of `button2` as the **top right** corner of the parent, while also accounting for the default anchor point of the button {0.5f, 0.5f}
    button2->setPosition(menu->getContentSize() - button2->getContentSize() / 2);

    menu->addChild(button1);
    menu->addChild(button2);

    // Also add the menu to a parent element
    //...
}
Here is what the result will look like ingame: 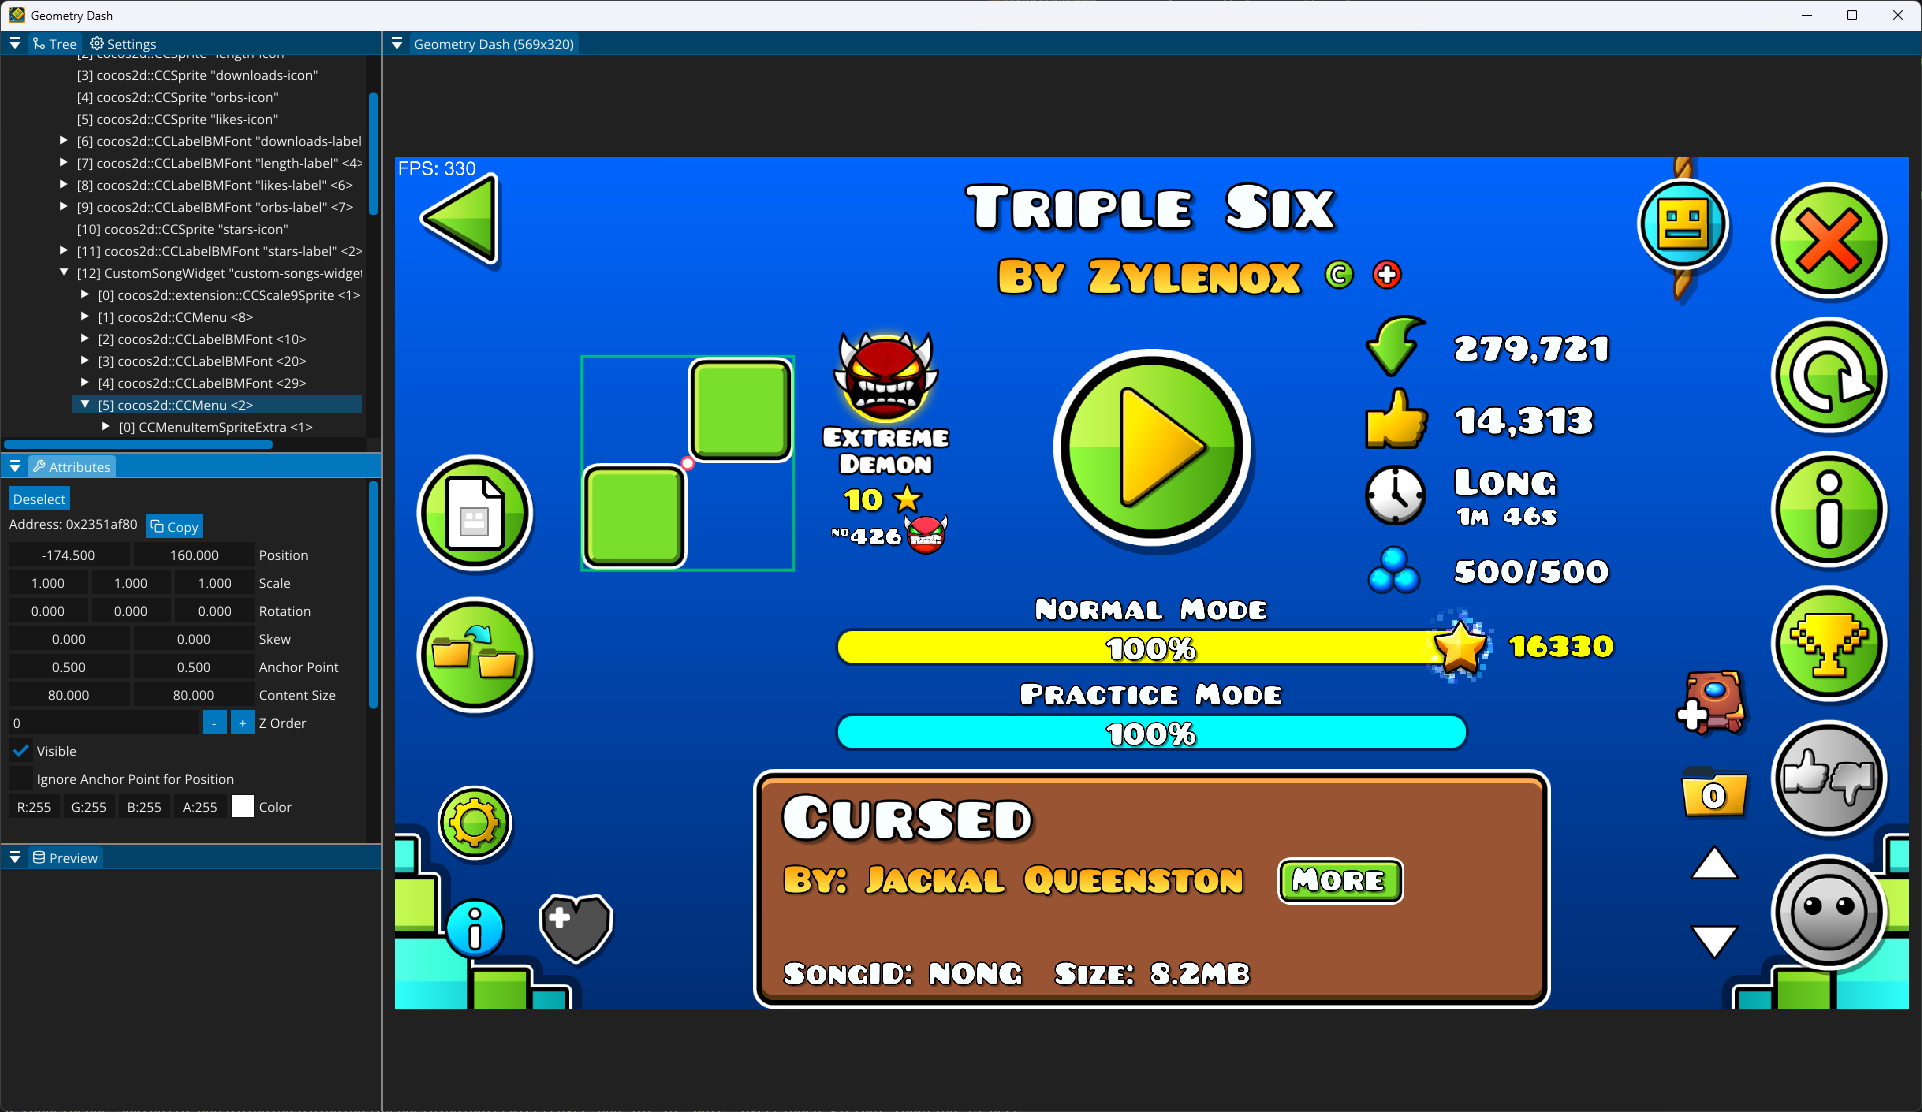
As you can see, the the menu has the perfect content size, and the buttons are placed in their right spots.
You might say “Why did we use the buttons’ content sizes to place them inside the menu? This doesn’t make any sense!”. To answer that, we have to talk about anchor points.
Anchor Point
The anchor point is the 3rd tool in our positioning toolbox. It decides 2 things:
- How will the be placed at the position it’s given?
- How will the node’s content size expand or decrease?
- How scaling the node works
Anchor points, like any other point, take 2 values: X and Y, which take values from 0.0f (left, bottom) up to 1.0f (top, right). You probably deduced that this works exactly like node positions.
First off, positioning. The anchor point decides which point of the node’s content size will be placed at the position it’s given. Here’s a simple table that should clarify this.
| Anchor Point | Location |
|---|---|
| { 0.0f, 0.0f } | Bottom Left |
| { 1.0f, 0.0f } | Bottom Right |
| { 0.0f, 1.0f } | Top Left |
| { 1.0f, 1.0f } | Top Right |
| { 0.5f, 0.5f } | Center |
Of course, you do not have to only use those values. Those are the most widely used anchor points.
The best way to test anchor points out is to use DevTools on the CCMenu example from above.
⚠️ There is a way to make the node ignore any anchor point given for positioning itself, using {0.0f, 0.0f} regardless of anchor point. You can do this using
node->ignoreAnchorPointForPosition(true), but this is HIGHLY DISCOURAGED, as it will only complicate things. If you remember from the example above, we disabled this stupid feature for the newly created CCMenu. There are a lot of RobTop nodes, and Cocos nodes that use this. For most, leaving it as it is is probably the best option, as changing it might break things. For your own nodes however, we recommend disabling it.
Second, how does it affect content size? It affects the resizing of said content size, restricting it (or setting a multiplier for it), depending on what values it gets.
For example, setting an anchor point of {0.0f, 0.5f} will prohibit the node’s content size from expanding to the left. Setting it to {1.0f, 0.5f} will prohibit the node’s content size from expanding to the right. As with positioning, experimenting with DevTools is the best way to learn how this works.
Additionally, different anchor points affect how the node’s children are moved when the content size changes.