Chapter 1.7: Hello, World!
If you just skipped to this chapter directly after seeing it in the navigation bar, you may be wondering why it has taken us 7 chapters to reach a Hello, World! program. Rest assured, the previous chapters are not just a waste; modding is a complex topic and Geode is an advanced framework. As such, we need to first lay a solid foundation for the basics of modding to build upon before we can get to actual code.
From here on out however, we’re starting to leave the lame theory part and beginning to enter the part where you actually get to make stuff.
And with that, let’s start building our Hello, World! mod!
Constructing the Mod
To begin with, we need to outline what our mod will actually do. The goal is simple: add some text to the main menu in GD that says “Hello, World!”.
Modifying the Layer
Our first step is to use what we learned in the previous chapter and modify MenuLayer:
#include <Geode/modify/MenuLayer.hpp>

class $modify(MenuLayer) {
};
Since we want to add things to the layer, let’s hook its init function, making sure to call the original:
#include <Geode/modify/MenuLayer.hpp>

class $modify(MenuLayer) {
    bool init() {
        if (!MenuLayer::init())
            return false;

        return true;
    }
};
Adding the label
Now it’s time to actually show the text. As outlined in Chapter 1.4, Cocos2d is node-based; we don’t do our own rendering, we leverage other nodes to do it for us. In this case, since we want to display text, we go for the standard CCLabelBMFont class:
#include <Geode/modify/MenuLayer.hpp>

class $modify(MenuLayer) {
    bool init() {
        if (!MenuLayer::init())
            return false;

        auto label = cocos2d::CCLabelBMFont::create("Hello, World!", "bigFont.fnt");

        return true;
    }
};
Everything Cocos2d-related lies in the cocos2d namespace, so we must prefix our usage of CCLabelBMFont::create with it. However, as you keep modding, having to stick cocos2d:: everywhere gets annoying really fast. In addition, Geode comes with a bunch of namespaces you probably also don’t want to rewrite every time. For this reason, Geode provides a geode::prelude namespace that automatically brings all Cocos2d and Geode-related namespaces to scope:
#include <Geode/modify/MenuLayer.hpp>

using namespace geode::prelude;

class $modify(MenuLayer) {
    bool init() {
        if (!MenuLayer::init())
            return false;

        auto label = CCLabelBMFont::create("Hello, World!", "bigFont.fnt");

        return true;
    }
};
ℹ️ If you don’t want to bring Geode namespaces into scope, you can just use
using namespace cocos2dinstead.
Now, the label isn’t currently a child of any layer, so it won’t show up anywhere. Let’s add it as a child to MenuLayer:
#include <Geode/modify/MenuLayer.hpp>

using namespace geode::prelude;

class $modify(MenuLayer) {
    bool init() {
        if (!MenuLayer::init())
            return false;

        auto label = CCLabelBMFont::create("Hello, World!", "bigFont.fnt");
        this->addChild(label);

        return true;
    }
};
Positioning the label
The default position for any node is (0, 0) which is at bottom left of the screen; however, we want to center our label in the middle of the screen. To do this, we need to first figure out what the size of the screen is, and to do this we use the getWinSize method on CCDirector:
#include <Geode/modify/MenuLayer.hpp>

using namespace geode::prelude;

class $modify(MenuLayer) {
    bool init() {
        if (!MenuLayer::init())
            return false;

        auto winSize = CCDirector::get()->getWinSize();

        auto label = CCLabelBMFont::create("Hello, World!", "bigFont.fnt");
        this->addChild(label);

        return true;
    }
};
Next, to actually position our label, we call the setPosition method on it, placing it halfway across the screen horizontally and vertically:
#include <Geode/modify/MenuLayer.hpp>

using namespace geode::prelude;

class $modify(MenuLayer) {
    bool init() {
        if (!MenuLayer::init())
            return false;

        auto winSize = CCDirector::get()->getWinSize();

        auto label = CCLabelBMFont::create("Hello, World!", "bigFont.fnt");
        label->setPosition(winSize.width / 2, winSize.height / 2);
        this->addChild(label);

        return true;
    }
};
All nodes are by default centered relative to their position, so doing this is enough to center our label in the middle of the screen. However, we can make this code more concise by knowing that winSize’s type is CCSize, and that dividing a CCSize by an integer is the same as dividing that size’s width and height by the integer. Since we are dividing both winSize.width and winSize.height by the same number, we can shorten it to just winSize / 2. In addition, all nodes have both a setPosition(float, float) and setPosition(CCPoint) setter by default, and CCSize is implicitly convertible to CCPoint.
All of this means that we can make our setPosition call shorter as just:
label->setPosition(winSize / 2);
Finished Mod
And with that, we have completed our Hello, World! mod. Here’s what the final code looks like:
#include <Geode/modify/MenuLayer.hpp>

using namespace geode::prelude;

class $modify(MenuLayer) {
    bool init() {
        if (!MenuLayer::init())
            return false;

        auto winSize = CCDirector::get()->getWinSize();

        auto label = CCLabelBMFont::create("Hello, World!", "bigFont.fnt");
        label->setPosition(winSize / 2);
        this->addChild(label);

        return true;
    }
};
To try the mod out, create a new mod using geode new, and then replace the code in src/main.cpp with the above. After building the mod, open up GD and you should see this:
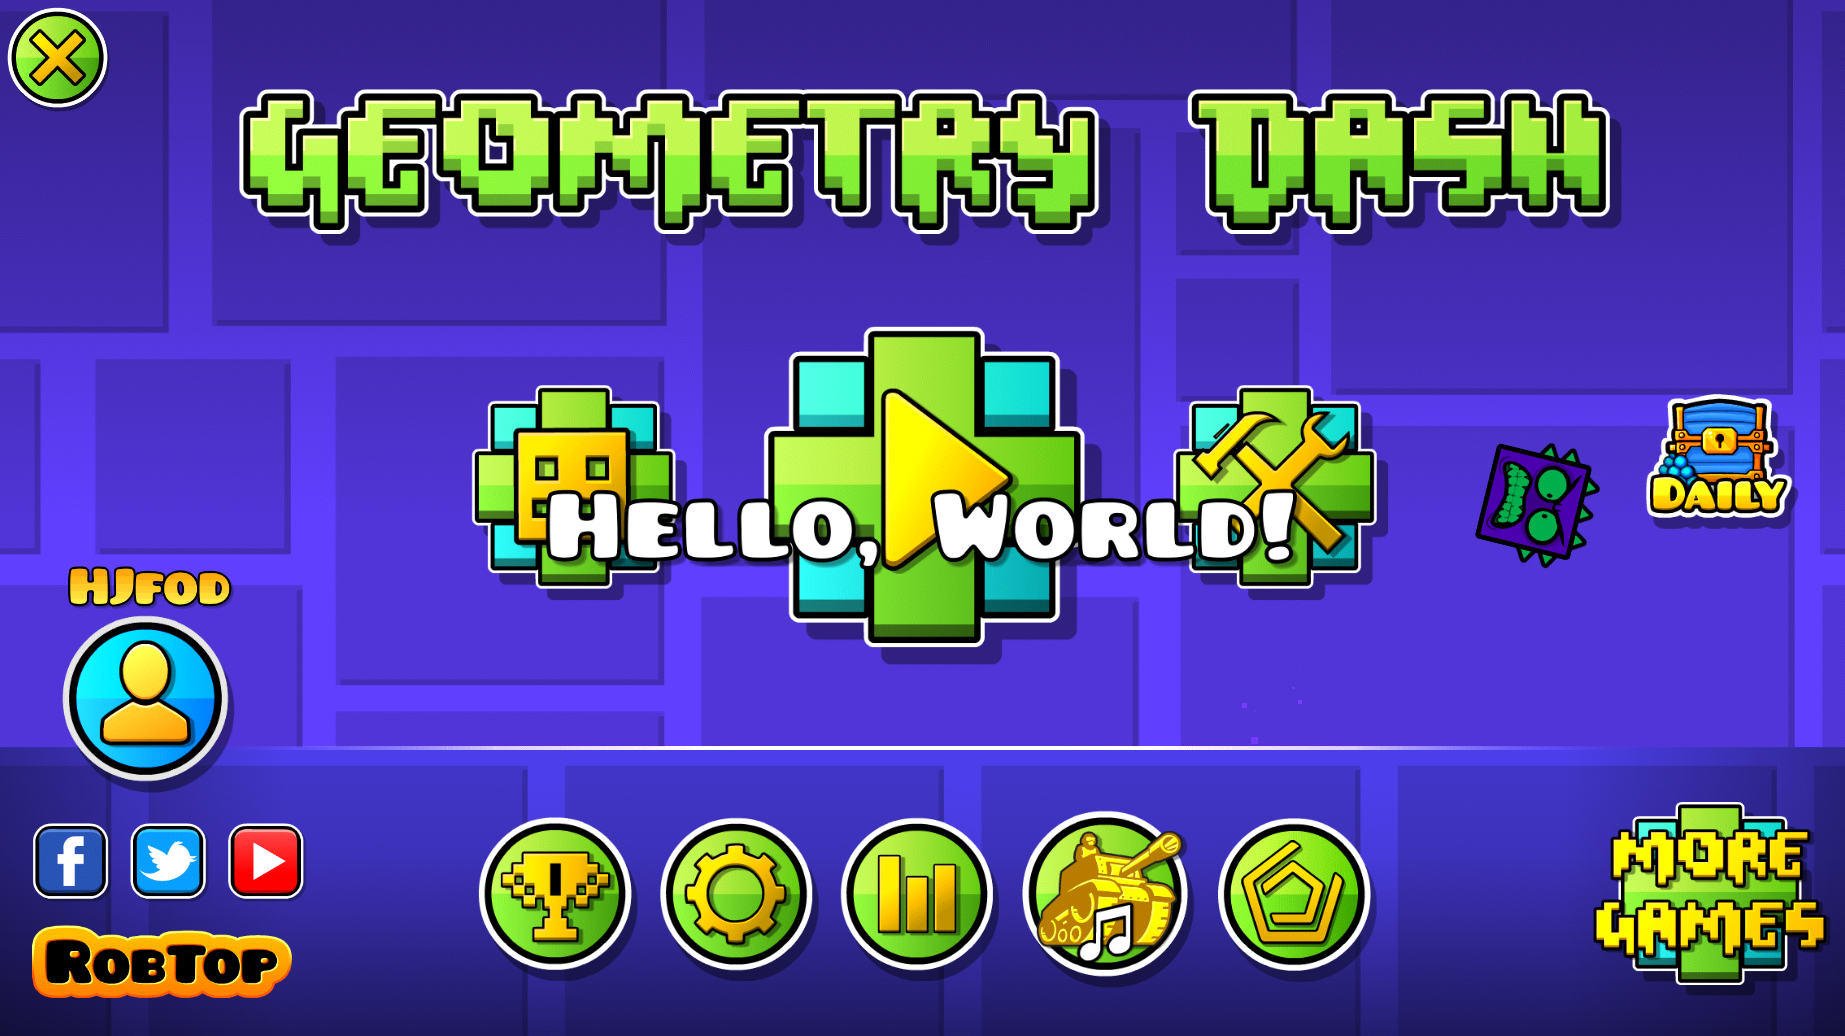
If it works for you, congratulations! You have now officially built your first Geometry Dash mod! Go grab a lil orange juice from the kitchen and give yourself a little treat :)
After drinking your juice however, it’s time to get back into business. So we’ve got a Hello, World! going, that’s great. Now it’s time to start crafting something actually useful.
In Volume 2 of the tutorial, we will start looking at reverse engineering and how making new mods actually works in practice. To start, let’s once again ask the following question: so how exactly does one make a mod?.