IDE Setup
You can use one of the following IDEs for developing Geode mods. Using an IDE is highly recommended, as they will give you code completion, intellisense, and simplify developing mods. Our recommended IDE is VS Code, which we also have a dedicated extension for.
Visual Studio Code
VSCode on Windows
Install the following VSCode extensions:
CMake ToolsGeode- Not required, but will provide some nice features.
As well as one of:
There are a few steps you should follow to get proper intellisense and code completion (you should only need to do these once per project, ideally):
- With VS Code open on your project, press F1 and run
CMake: Select a Kit. This will bring up a list of installed compilers on your machine. This will also open automatically whenever opening a new project.

Depending on which compiler you want to use, pick either:
- Clang (not
Clang-cl) - recommended - Visual Studio 20xx Release - amd64 (not
amd64_x86or any other ones)
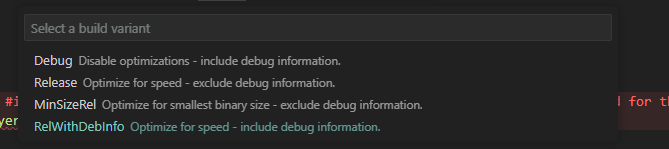
- Now to select the build variant, press F1 and run
CMake: Select Variant. We recommend RelWithDebInfo for easier debugging, as Debug may sometimes cause obscure crashes.
- If using Clang with the clangd extension, press F1 and run
CMake: Edit User-Local CMake Kits. This will open a file, in there find the chosen kit (one with Clang in the name) and add these keys to it:
"cmakeSettings": {
    "CMAKE_EXPORT_COMPILE_COMMANDS": "ON"
},
"preferredGenerator": {
    "name": "Ninja"
}
Additionally, we recommend disabling clangd auto header insertion, as it doesn’t work well with Geode and will spam useless headers in your project. Press F1 and run Preferences: Open User Settings (JSON) and add the following lines:
"clangd.arguments": [
    "-header-insertion=never"
],
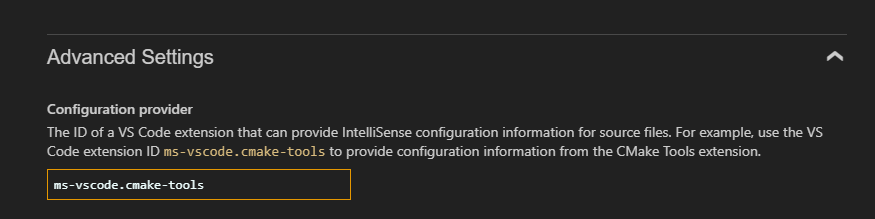
- If instead of Clang you chose the C/C++ extension, you need to register CMake as the Configuration Provider for the C++ extension by pressing F1 and running
C/C++: Edit Configurations (UI). Scroll down to Advanced options, and set the Configuration Provider asms-vscode.cmake-tools.
Now, build your mod by pressing F1 and running CMake: Build. You must build your mod first so that errors such as #include <Geode/modify/MenuLayer.hpp> not found go away. If the mod was built successfully, the exit code at the end should be 0. If any errors still persist after building the mod, try restarting VS Code.
VSCode on Mac
For VS Code on Mac, we recommend a few extensions:
clangdCMake ToolsGeode- Not required, but will provide some nice features.
There are a few steps you should follow to get proper intellisense (you should only need to do these once per project, ideally):
- With VSCode open on your project, press F1 and run
CMake: Select a Kit. You should choose Clang.
Now, build your mod by pressing F1 and running CMake: Build. You must build your mod first so that errors such as #include <Geode/modify/MenuLayer.hpp> not found go away. If the mod was built successfully, the exit code at the end should be 0. If any errors still persist after building the mod, try restarting VS Code.
VSCode on Linux
The setup is very similar to VSCode on Mac, so you can follow that. The primary difference is you have to manually create a kit, which can be done like so:
Open the Command Palette (with F1 or Ctrl + Shift + P) and run the command CMake: Edit User-Local CMake Kits (requires the CMake Tools extension and an opened CMake project)
Add a new kit to the list:
{
    "name": "Geode Windows 64-bit",
    "compilers": {
        "C": "/usr/bin/clang",
        "CXX": "/usr/bin/clang++"
    },
    "isTrusted": true,
    "toolchainFile": "${userHome}/.local/share/Geode/cross-tools/clang-msvc-sdk/clang-msvc.cmake",
    "cmakeSettings": {
        "HOST_ARCH": "x86_64",
        "SPLAT_DIR": "${userHome}/.local/share/Geode/cross-tools/splat",
        "CMAKE_EXPORT_COMPILE_COMMANDS": "ON"
    }
}
If the toolchain and/or splat weren’t installed via geode sdk install-linux, modify the paths accordingly.
Additionally, if you have Ninja installed, it’s a good idea to set it as the generator instead of make, as it’s much faster and uses multiple CPU cores by default unlike make. Add this to the JSON object above:
"preferredGenerator": {
    "name": "Ninja"
}
Now, you should be able to select the kit and build mods!
Additionally, while this does not affect 90% of people, if you use SIMD intrinsics or include a library that does, you might get strange compile/link errors with the configuration above. This can be fixed by changing the compiler from clang to clang-cl, like so:
"toolchainFile"to${userHome}/.local/share/Geode/cross-tools/clang-msvc-sdk/clang-cl-msvc.cmake"compilers"/"C"to/usr/bin/clang-cl"compilers"/"CXX"to/usr/bin/clang-cl
Visual Studio
Some Visual Studio experience is recommended before you try to use this, but if you don’t then you’ll probably be fine.
Modern Visual Studio can handle CMake projects automatically, so assuming your VS has CMake support, just open your mod project folder. You’ll know it’s working if a console opens up at the bottom of your Visual Studio, and it starts gathering information from CMake.
Now, before you build, make sure to change these settings (these need to be changed in every single project you make):
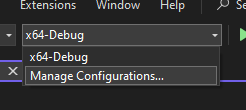
- Click the Debug options (This is usually a drop-down menu at the top of your screen that says “x64-Debug”)
- Click “Manage Configurations” inside that drop-down
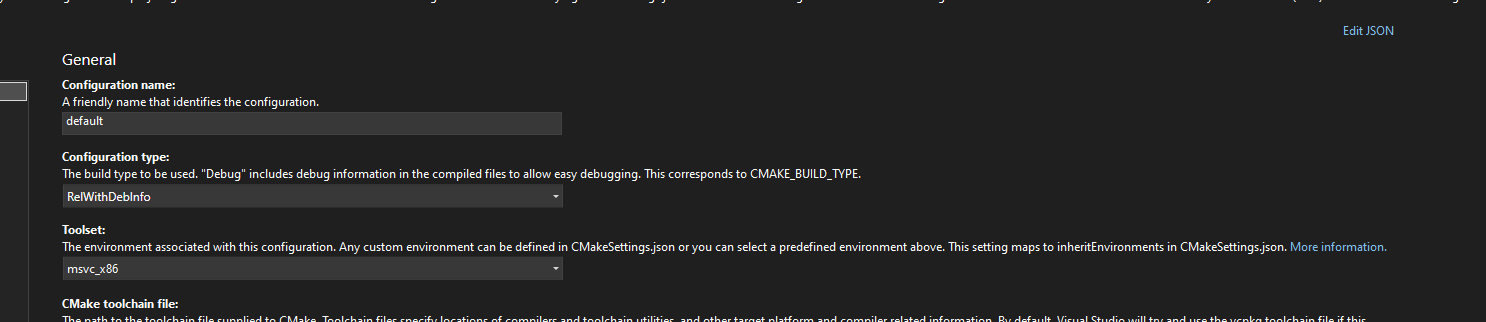
- Change config type to
ReleaseorRelWithDebInfo. We recommendRelWithDebInfo, since it provides easier debugging. You cannot useDebugfor this! - Make sure the toolset is set to
x64 - At this point you can also give your configuration a friendly name such as “default” or “release” or something like that
- And make sure to use Ctrl + S to save your changes
Here’s an example of a configuration that should work:
Now you may build your mod, by pressing F7 or Ctrl + B (If those keybinds don’t work, click Build at the top, then either Build or Build All)
If there are errors similar to VS Code (such as #include <Geode/modify/MenuLayer.hpp> not found) after you’ve built, restarting Visual Studio should make them go away.
CLion
CLion on Windows
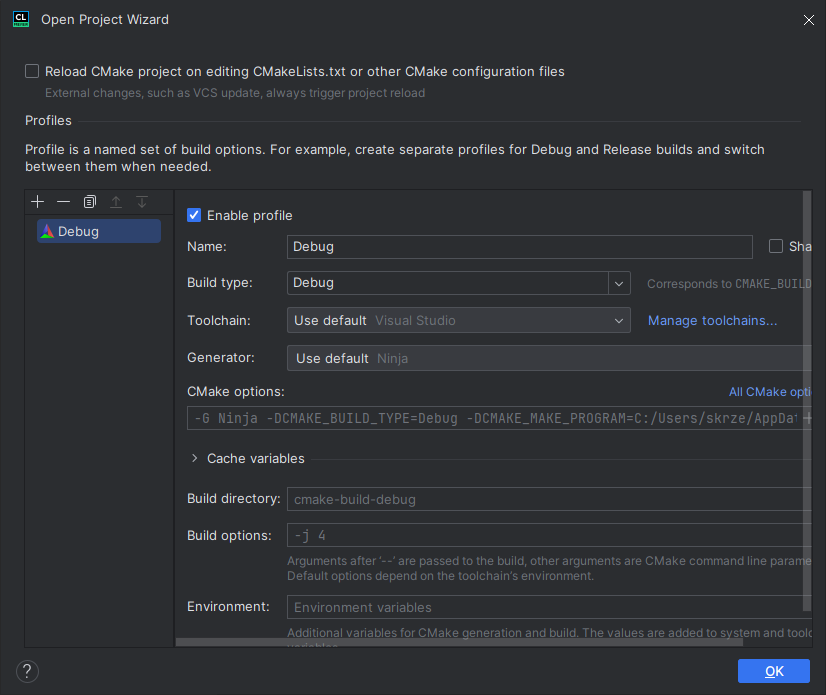
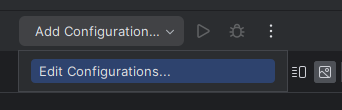
No additional plugins are needed - the only thing you need to do is to configure your toolchain correctly. When you open your mod’s directory in CLion for the first time, you’ll be met with an Open Project Wizard:
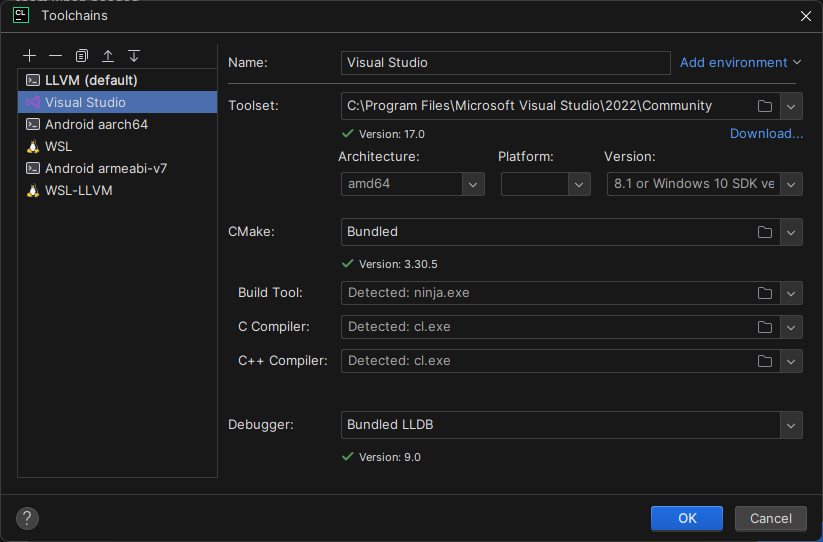
If this is the first time you’re launching CLion, click the “Manage toolchains…” button, which will open a window where you can add a new toolchain.
Here’s an example of how to set up Visual Studio toolchain:
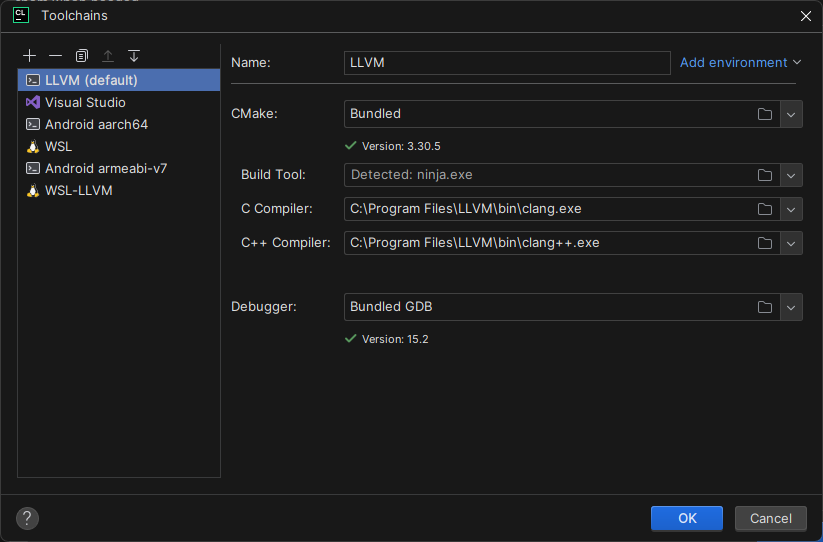
And here’s an example of how to set up Clang toolchain:
After that, in the Open Project Wizard, you need to make sure that:
- Build type is set to
ReleaseorRelWithDebInfo(we recommendRelWithDebInfo, sinceDebugmight cause obscure crashes) - Toolchain is set to Visual Studio or Clang/LLVM
- Generator is set to Visual Studio 17 2022 or Ninja (if you have it installed)
In the end it should look like this:
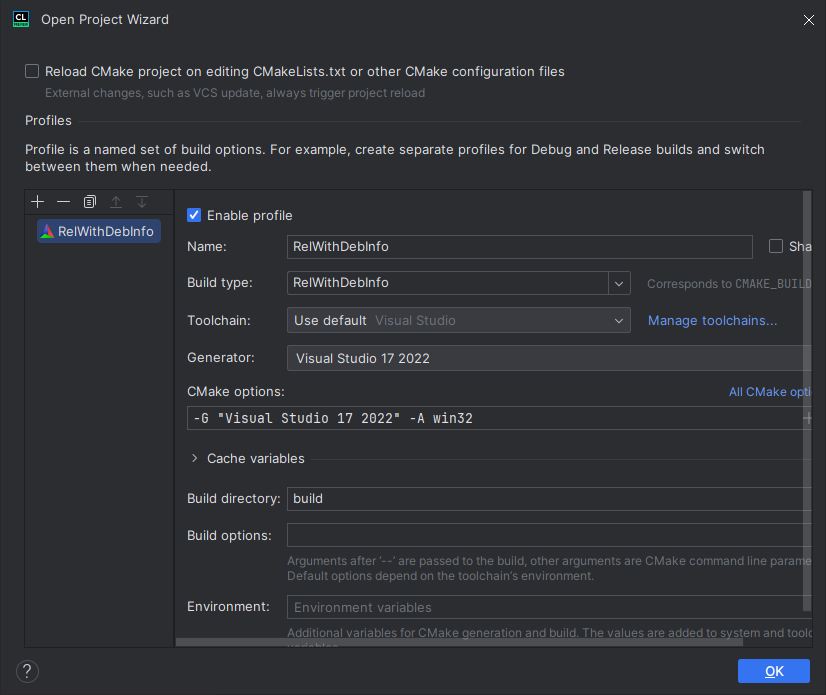
Now you can press OK and CMake will run for the first time. Wait until it finishes, and you should see a dropdown in the top right corner of the window that says NameOfTheMod (or whatever you called your project). Click on it, and pick NameOfTheMod_PACKAGE instead, which will trigger post build steps and package/install the mod to Geometry Dash.
Now click the hammer icon in the top right corner next to build the mod:
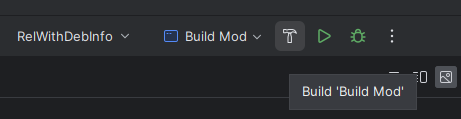
The build should end with a message saying Build finished and (assuming you ran geode config setup before) the mod should now be installed to Geometry Dash.
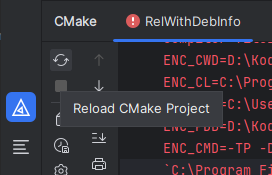
Don’t forget to reload CMake after you add new files to the project.
CLion on Linux
Pretty much the same as on Windows except for setting up the toolchain.
First step is to create an environment file with the following content:
export GEODE_SDK=$HOME/Documents/Geode
export SPLAT_DIR=$HOME/.local/share/Geode/cross-tools/splat
export CMAKE_TOOLCHAIN_FILE=$HOME/.local/share/Geode/cross-tools/clang-msvc-sdk/clang-msvc.cmake
export HOST_ARCH=x86_64
If the toolchain and/or splat weren’t installed via geode sdk install-linux, modify the paths accordingly.
Save it as geode-env.sh in your home directory (or wherever you want, just remember the path).
⚠️ If you’re using a non default shell (like fish), you might need to edit the environment file to use the correct syntax. For example, fish uses
set -gx VAR valueinstead ofexport VAR=value.
Now, in the toolchain settings on the right side of the Name field, click the Add environment button and select the file you just created.
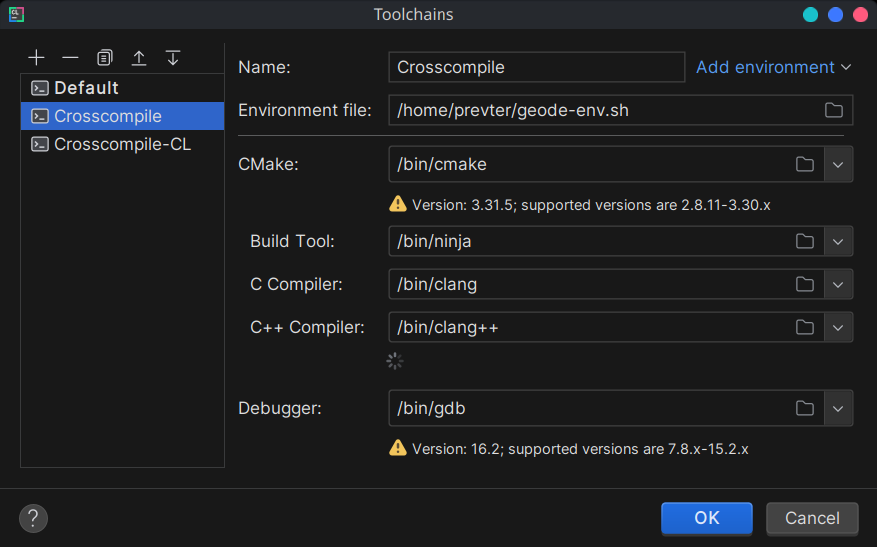
After that, you can follow the same steps as on Windows to build your mod.
For some specific mods/libraries (most people won’t need this), you might also want to add the clang-cl toolchain. Everything is the same as with clang, except you have to use the clang-cl-msvc.cmake toolchain file instead. (Copy the environment file and change the CMAKE_TOOLCHAIN_FILE variable to point to the clang-cl-msvc.cmake file.)
Also make sure you’re using clang-cl as the compiler in the toolchain settings.